• Home
  • DIY
    • Baseball
    • Marriage
    • Everday
    • Mom Life
    • Fashion
    • liketoknow.it
    • Amazon Storefront
    • scolahouse store
    • OUR HOME
  • About
  • Contact
Menu

Scola House

Street Address
City, State, Zip
Creating a Home You Love

Your Custom Text Here

Scola House

  • Home
  • DIY
  • Lifestyle
    • Baseball
    • Marriage
    • Everday
    • Mom Life
    • Fashion
  • Shop
    • liketoknow.it
    • Amazon Storefront
    • scolahouse store
    • OUR HOME
  • About
  • Contact

Front Door Makeover! (Using only paint!)

May 5, 2020 Caroline Scolamiero
Front doorbannerpngpng.png

When you wake up feeling creative, you make use of that! I have always wanted to redo the front door of our 1940s home , but never felt motivated enough until a few days ago. I woke up feeling creative, and decided to put all of that determination into our front door!

BEFORE.png
AFTER.jpg

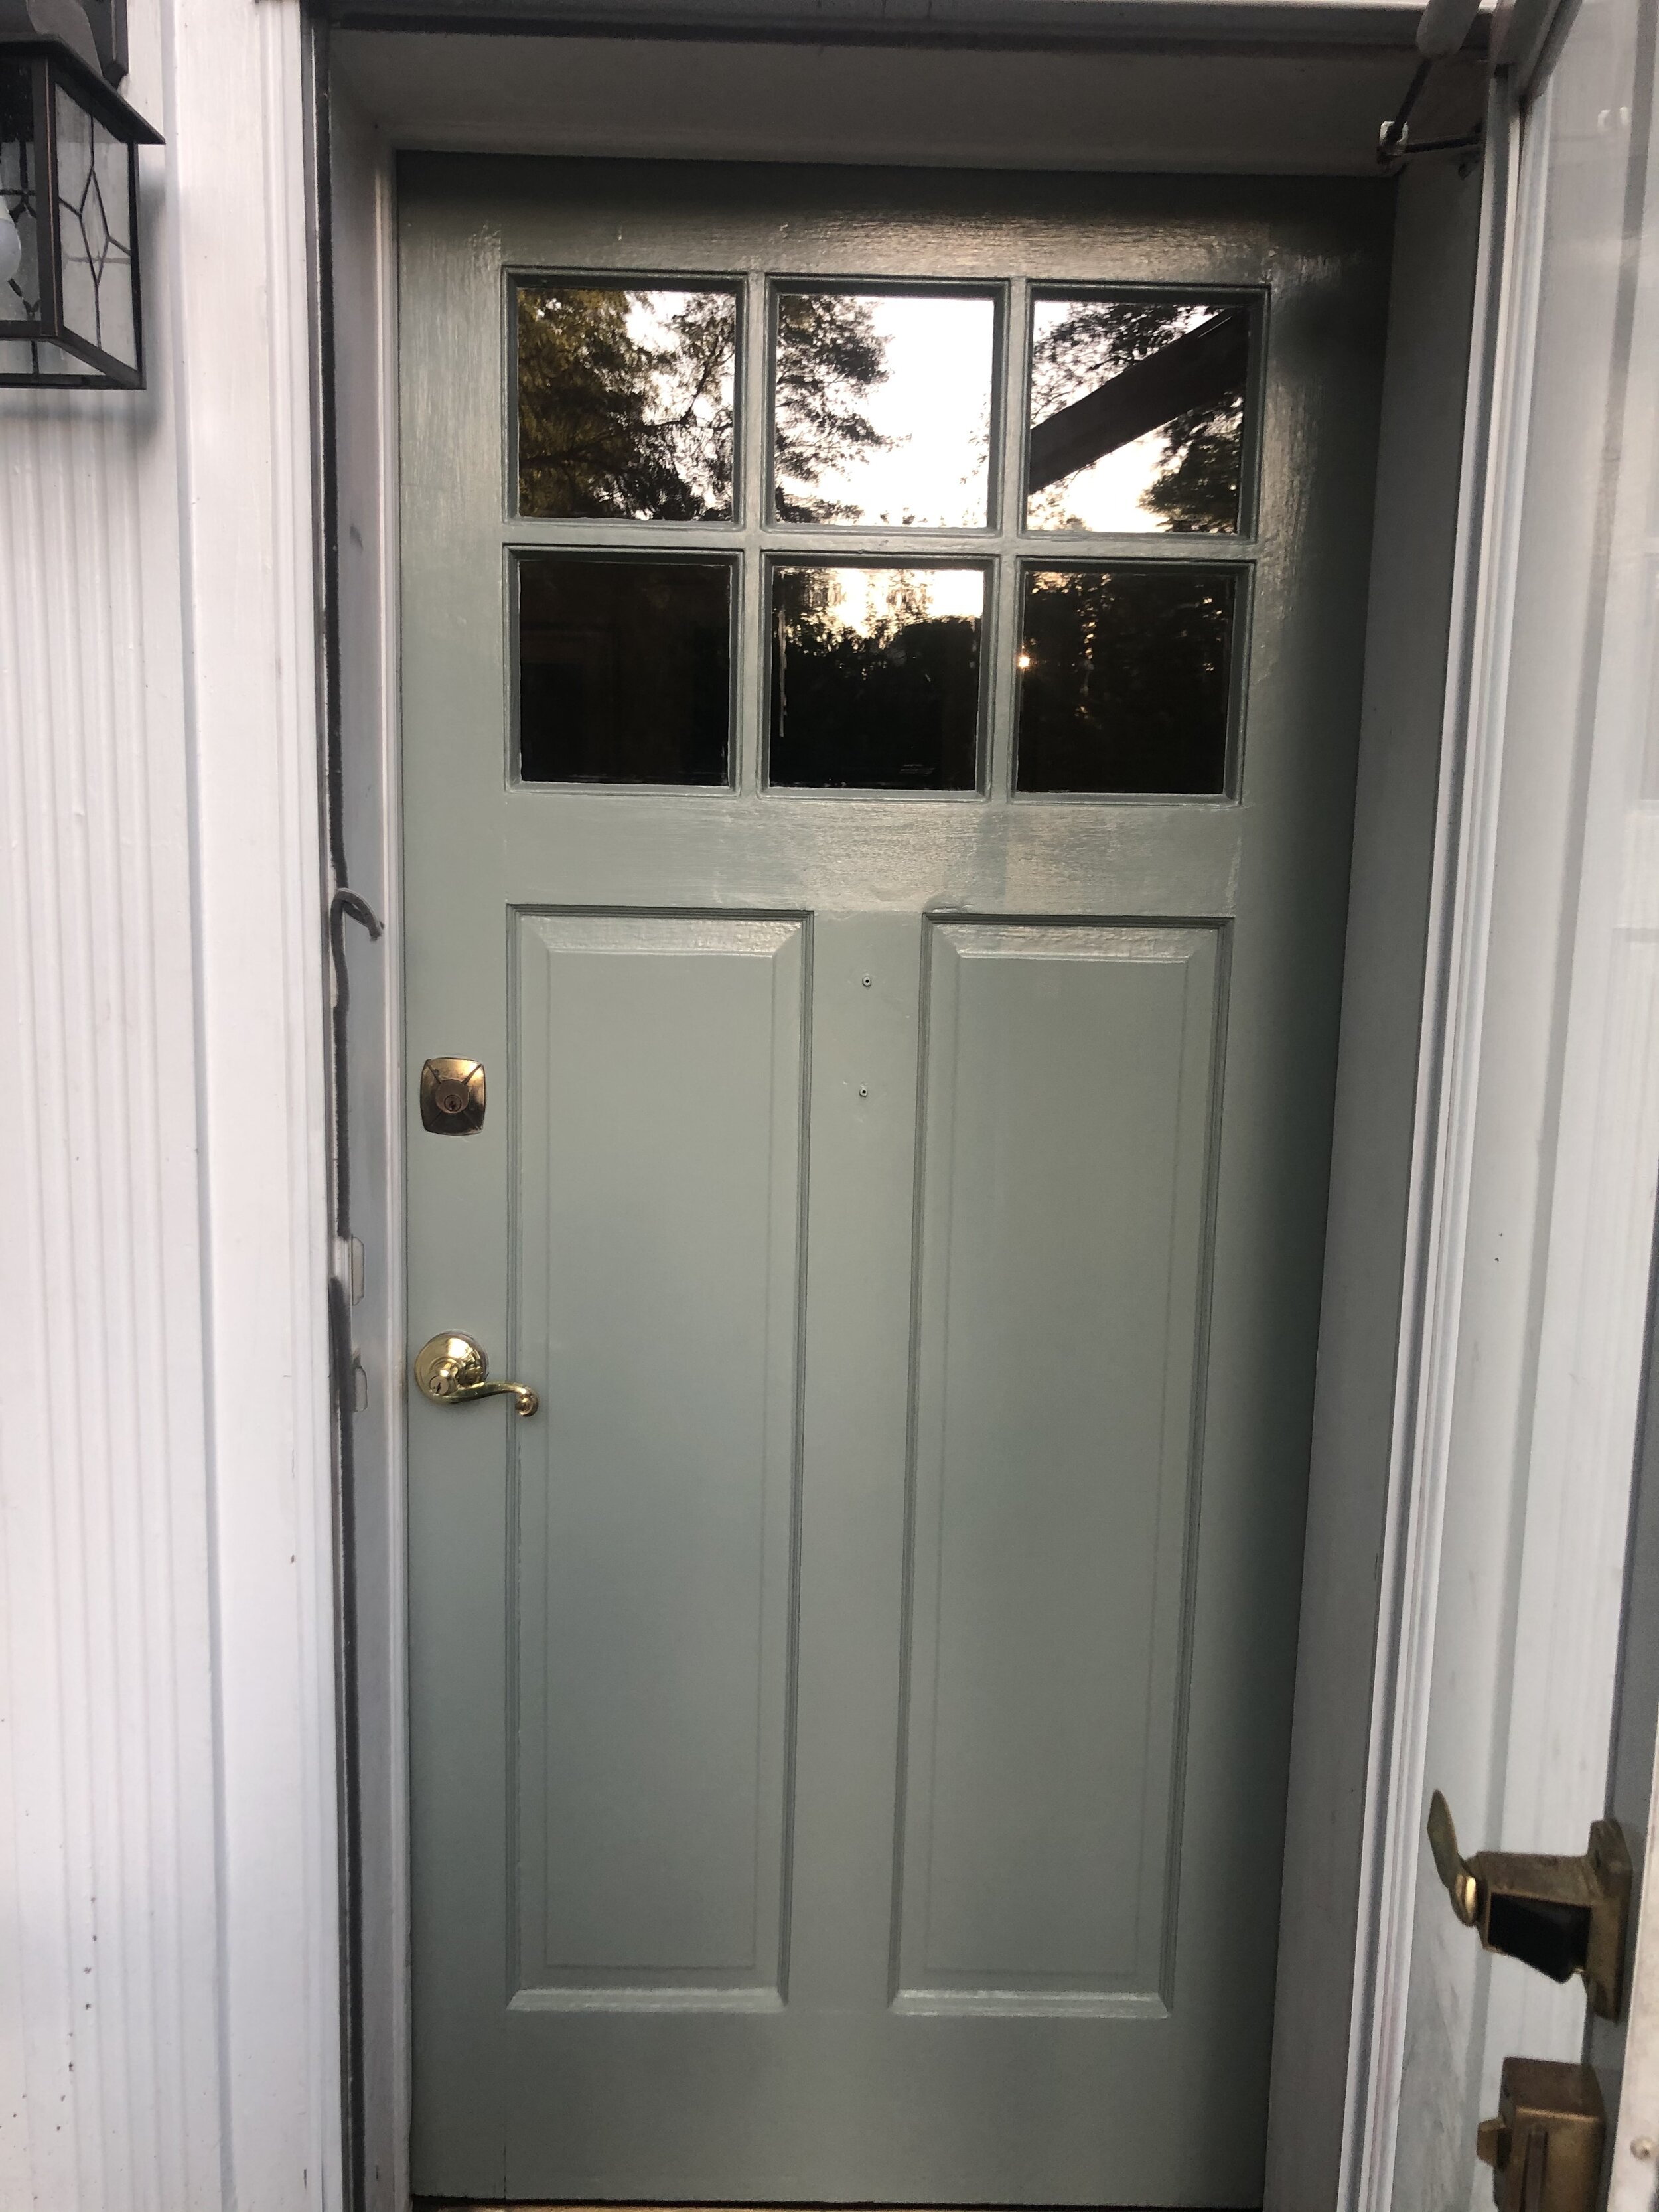
These spanish tiles were first to go. I couldn’t stand them from the moment we purchased the house. I also knew the red had to go. Some love a traditional brick home with red door…but not me. I needed something brighter and fresh looking. An aqua door is a bit too ‘trendy’ for me and every other color looked boring or too eccentric. I browsed through Pinterest over and over and finally came across this picture! It is the perfect mix of blue/green'/grey I didn’t even know I wanted.

The color is called Pigeon 25 by Farrow and Ball. As we do with all of our paints, we had Lowe’s color match it to a Valspar paint to save money. We decided on a satin gloss in the DuraMax brand by Valspar. I barely used half of a quart of paint on the front of the door.

Screen+Shot+2020-04-28+at+4.48.21+PM.jpg

I’m not sure if the door is original to the home - but I think it may be. Our windows are original (something we need to replace at some point :)). After seeing the layers of paint the door had I knew I had gotten myself into a project much greater than just slapping on a new coat of paint. I had to redo the door completely.

doorbefore1.jpg

I started by removing the tiles with a metal scrapper. I chose this over a hammer because I didn’t want to rip off any wood on accident. Remove any and all hardware at this point also!

IMG_0881.jpg

Next, I began sanding. I use this sander and LOVE it. Inexpensive, convenient and user friendly if you only need it for side projects here and there. Here’s another one that has better reviews than mine too! I had to switch between two different tools attachments to get the slanted surface of the window panes. Don’t touch the window with the electric sander either - it will scratch windows. Use a sanding block if needed to get close. Make sure to wear face covering or you will be sneezing paint colored boogies for days after haha. If you don’t have an electric sander, you can use a sanding block on the whole door also.

If you don’t want to sand the door down completely (like me)..make sure to at least sand off :

  • chipping paint & it’s edges

  • the outer glossy layer

  • old paint dripping/running spots until flat

  • paint pulling away from the surface

  • imperfections from previous painting/build up/flaws from pulling off numbers/knockers

Then the door needs to be cleaned well. I take my vacuum hose attachment to the whole door first, then wipe with a damp rag and then a dry rag. Scrub off any dirt build up and get the crevices/area attached to windows cleaned thoroughly.

sanded door.png


Now you are ready to paint! I chose to hand paint with this brush. I prefer the hand painted look, but if not you can use a small roller. Some suggest foam but ensure you have the foam soaked in paint before applying to reduce air bubbles on the door when rolling. I put one coat on and let it dry overnight, then followed with the second coat the next day.

After removing the tape I realized it pulled off some paint and allowed some red to show through on the window edges. I touched up spots around the windows with a small paint brush I usually would use for acrylic painting. This takes a steady hand, but usually if you go too far on a window you can scrape it off.

I chose not to prime because I have an exterior storm door and the paint I chose is higher quality with primer already in it. I needed 2 coats of paint total!

IMG_0919.jpg

Lastly I installed this new door knob (under $50). I linked a few other great options at the bottom of the post too . We added these aluminum numbers to the door front. Then, I spray painted the knocker and dead bolt with this paint I swear by and use for almost all metals in our home. This is how I sprayed the deadbolt since It is not removable. I used tape and packaging/newspaper/plastic to cover the surrounding areas , then sprayed.

IMG_0932 2.png

I decided last-minute to spray our storm door hardware also to match since it is really seen more. Since I’m not using a sealant/secondary protective spray I may end up having to respray these over and over as they chip and scratch but it was a breeze to do so I’m not too worried. And just like that we are DONE! It completely changes the look and feel of our home.

Next on our list is to find new planters and plants for our front porch. :) stay tuned!

findoor.JPG
home.JPG
door4.jpg
doorafter3.JPG
2518.JPG
homedoorfin.JPG

QUICK LINKS:

  • Paint Color: Pigeon No.25 by Farrow & Ball

  • Metal Spray Paint : Rustoleum Oil Rubbed Bronze

  • Door Handle

  • Door Numbers

  • Electric Sander option 1 & option 2

In budget friendly, repaint Tags front door, repainting, renovations, home reno, front door update, farrow and ball, repaint front door, lowes, home depot
Comment

Foyer Update

April 27, 2020 Caroline Scolamiero
foyerupdategraphicfinal.png

The moment we moved walked through the our house I couldn’t get past the different shades of tan on every wall and that every room had textured wallpaper somewhere. Our hallway/foyer area is the first thing that hits your eye when you come in and it was the biggest eyesore to me after we painted every other room white. The tan grass cloth stuck out and made the house choppy feeling. I knew I would get around to painting it at some point but it was on the bottom of our list…then came COVID19 quarantine. So as our sweet Noah got himself into a schedule, we had more time to work on little projects here and there.

 
Hallway Update mood board.png


The wallpaper was actually in decent condition. Slightly ripped in a few spots (what looks like it was once a nice scratching wall for a cat lol) and peeling in corners from the settlement cracks that covered our home’s walls. I knew I wanted to keep the texture of the walls. It gave the small area something special where there is little room to put anything fun in it. Even though I was shot down from the Lowe’s employees, I decided I was sticking to my vision and keeping the wallpaper while painting over it. I had to repair first and foremost.

IMG_0493.jpeg
IMG_0494.jpeg

I found this awesome product for cheap on Amazon and barely used 1/8 of it on the wall corners and trim areas that were peeling. I pulled back the peeling paper, and applied the product to the wall behind with a small paint brush. I made sure to press, spread and hold the paper for a bit to make sure it adhered fully without bubbles. I then let it fully dry for a day. It worked wonders (and this is some thick paper).

*note - this product goes on clear and dries glossy…i wouldn’t use it/let it go on top of the paper unless you want a shiny finish. Make sure to clean the paper with a rag before it dries to prevent this on the meeting seams of wallpaper.

IMG_0519.jpeg

I haven’t filled the holes left after removing some non working home systems the previous owners left. I’m still debating the best way to do this on textured paper I can’t really sand down…will update once I tackle this... Then we primed and painted like normal! We used a 1/2 in. nap roller brush (here) instead of your normal 1/4 in. you would use for a smooth wall. This allowed it to press into the textured fabric easier, making the process faster. I also used a smaller roller brush (here) with 1/2 nap for the trim instead of a bristle brush.

IMG_0797.JPG
foyer.jpg

Our paint color is White Dove by Benjamin Moore . The same color we used in pretty much our entire home, its a creamier white that matches great with a variety of trims and ceiling colors. Kind of a chameleon white - why we love it so much! We don’t pay for BM paint though (not at that stage in life yet haha), so we have Lowes or Home Depot match the color in their brand paint, Valspar, etc. They can do this with any brand’s colors.

bfafterfoyer.png
IMG_8833.jpg
IMG_2089.JPG
mapifulpic.jpg

This map print was sent to us from mapiful! It is a starmap of the location and night we got married. They have a bunch of unique options for meaningful, unique gifts and home decor. The rug is from southeastern salvage , a local store here in Columbia, S.C. This rug and this one give a similar look!

We are looking for a new light fixture like this or this once it’s in budget - But those will come at some point :)

We are still deciding on the plant for this space - what do you think of this fiddle leaf we borrowed to see how we liked it before purchasing?! This room gets little light so maybe something easier to keep alive…

This is the one we borrowed from a friend here!

As of now- we spent under $200 on this including everything you see!

IMG_2094.JPG
IMG_2087.JPG
IMG_0752.JPG
IMG_0785.JPG

QUICK LINKS:

  • Wallpaper Seam Repair

  • Primer

  • 1/2 in nap roller brush (larger)

  • 1/2 nap roller brush (smaller for trim)

  • Wall Color: White Dove by BM.

  • Mapiful Custom StarMap

  • Similar Cowhide Rugs - Option 1 , Option 2 , Option 3.

  • Basket - TJ Maxx , some others I love here and here

  • Faux Fiddle Leaf : this one is show, option 2


In budget friendly Tags home reno, renovations, painting, design, style, lifestyle, grasscloth
Comment